Connecting to VNC Server Securely With Putty On Windows
In my previous post Installing VNC Server on CentOS, I showed you how to install, configure and connect to a VNC Server on CentOS. However, this connection from the client to the server is not secure, and the password sent to the server is sent as plain text over an unsecure channel.
In order to secure the VNC connection and encrypt all the data sent, SSH tunneling can be used to prevent the data from being sent as plain text from the client to the server.
SSH Tunneling can be easily created with Putty on windows. Putty can be downloaded from here.
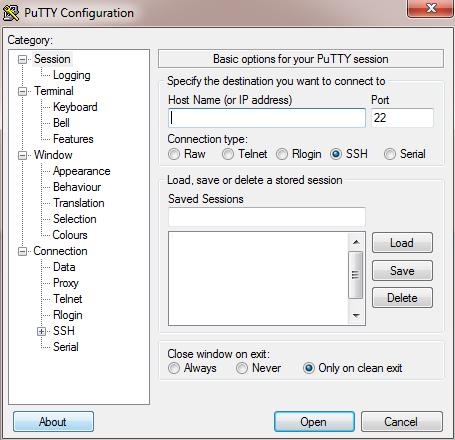
Open Putty, and write the IP address or hostname of the server:
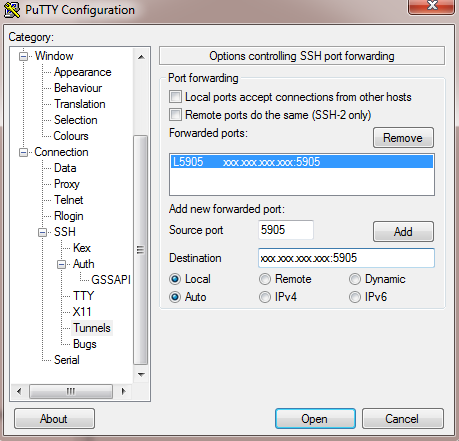
Go to SSH => Auth => Tunnels and write the IP Address and port number of your VNC server and click Add.
Note: All VNC ports start with 590X, where X is the number that you defined on your server in /etc/sysconfig/vncserver. In my example, I’ll assume I assigned the number 5 as my port, so the port in Putty will be 5905. (Make sure your replace xxx.xxx.xxx.xxx by your real server ip or hostname).
Now either click “Open“, or go Back to “Session” and save the session, so that you don’t have to re-write the info everytime.
After clicking open, login to your server and make sure you have your VNC server installed and started.
service vncserver restart
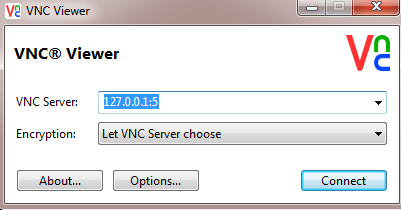
Open your VNC Viewer client, and write your localhost IP (always 127.0.0.1) followed by the port number as follows (port number is 5 in my case), and click Connect:
Enter your VNC password and click OK. Your connection to the server should be tunneled and secured.
Any questions or suggestions? Please leave a comment below!


